Laser Cutting 3D Model: How I Turned a Failing Client Project into a Win with Turnifure ModMaker
Why this laser cutting 3d model almost failed
Laser cutting 3d model projects look perfect on-screen, but mine didn’t behave in the workshop. Clean geometry isn’t enough if real-world stock and joints disagree. Some slots were too tight and cracked, others were too loose and wobbly. I tweaked kerf, power, and speed repeatedly and still kept wasting sheets. Deadlines don’t care about scrap, and neither do clients. I needed a way to control the fit, not just redraw lines.
Table of Contents
The two settings that changed everything
After dozens of test cuts, I realized success depends on two variables for any laser cutting 3d model: actual material thickness and insert/slot fit. The label might say 6 mm, but 5.75–6.25 mm is common in the real world. If you set thickness and choose a fit (tight for permanent joints, serviceable for panels you open), the project starts to click together-literally.
My midnight discovery: Turnifure ModMaker
At 1:30 AM I discovered Turnifure’s ModMaker. It lets you choose a design and dial thickness and fit with precise sliders, then export DXF/SVG files. The power of ModMaker is not fancy visuals-it’s the discipline of matching the design to your actual sheet. For my laser cutting 3d model, the first test after dialing the fit felt like magic. The insert seated with a confident ‘thunk’. Try Turnifure ModMaker (insert your affiliate link)
Step-by-step: How I fixed the laser cutting 3d model
Here’s the workflow I now use for every laser cutting 3d model:
1) Measure your sheet with a caliper-write the real number.
2) Cut a small coupon to test fits on the same stock.
3) In ModMaker, set material thickness and try tight vs serviceable fits.
4) Export DXF/SVG and import into your CAM/CAD workflow.
5) Cut only two critical pieces first; test the fit.
6) If it feels right, nest and cut the full set.
7) Log the values in a fit notebook for your next laser cutting 3d model.
7 proven lessons for your next cut (laser cutting 3d model edition)
1) Reality beats theory: measure every batch.
2) Fit is a design choice: tight looks premium; serviceable is practical.
3) Start micro: tiny coupons save sheets.
4) Confirm before committing: test critical parts first.
5) Kerf matters after fit: set thickness/fit first, then kerf.
6) Document once, win forever: keep material, batch, thickness, fit notes.
7) Use parametric tools like ModMaker to eliminate guesswork in any laser cutting 3d model.
Mini case study: The nameplate box (client project)
The brief was a compact nameplate box with a slanted front and a slide in backing plate. My first two rounds had rubbing edges and floppy joints. Switching to a ModMaker method fixed it fast: I cut a coupon on the same sheet, chose a tight fit for the main structure and a serviceable fit for the backing, exported fresh files, and verified with top and side panels before committing to the full job. The final laser cutting 3d model assembled squarely with no bruised edges.
Troubleshooting fit: quick fixes for a laser cutting 3d model
If joints crack, reduce tightness or add a chamfer to leading edges. If joints wobble, increase fit a notch or switch to a better sheet. Humid MDF can swell; dry stock can shrink. Keep offcuts from each batch for rapid coupons. For high stress corners, a tiny bolt + insert nut can preserve edges while you keep the clean press fit look.
Material guide: MDF vs plywood vs acrylic (laser cutting 3d model)
MDF cuts smoothly but can bruise on tight press fits-great for prototypes. Plywood holds edges better but varies in thickness and core quality; measure carefully. Acrylic wants clean, polished edges and responds best to serviceable fits; it can crack if forced. For any laser cutting 3d model, match the fit to the material’s personality.
Import checklist (DXF/SVG) for a laser cutting 3d model
• Verify units on import (mm vs inch).
• Join loose segments; remove duplicate lines.
• Confirm layer colors/lineweights if your CAM depends on them.
• Simulate the toolpath and check lead ins.
• Nest parts efficiently to reduce scrap.
• Label critical parts so assembly is intuitive.
Kerf basics without the headache (laser cutting 3d model)
Kerf is the material the laser removes. After thickness/fit, kerf is the next dial. Run a simple comb test tovestimate kerf quickly. If your test joint is slightly loose, tighten fit or offset geometry. For a consistent laser cutting 3d model workflow, record kerf alongside fit values.
Common mistakes to avoid in a laser cutting 3d model
Don’t rely on the nominal thickness; don’t skip coupon tests; don’t cut the whole set before testing; don’t mix sheets from different batches mid-project; and don’t ignore the grain direction on plywood- it affects strength where your inserts grip.
Tools, files, and helpful links (laser cutting 3d model)
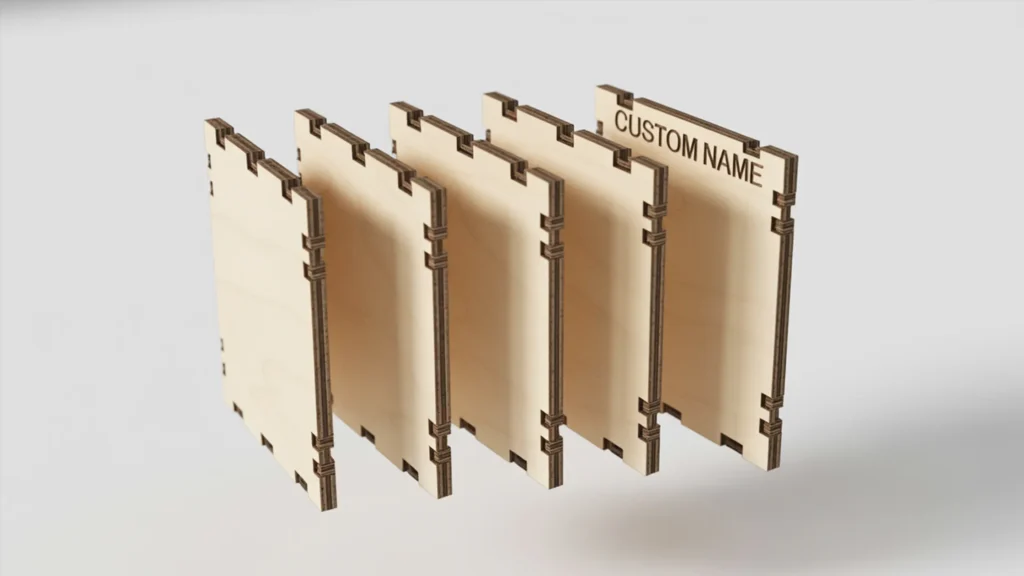
Turnifure ModMaker: Adjust your material thickness and insert fit, then instantly export DXF/SVG files ready for cutting.
Try ModMaker Here
Explore Turnifure Models: Browse a wide range of parametric CNC furniture models—desks, tables, boxes, and more. Each model can be customized in ModMaker before export.
View Turnifure Models
My Services (Custom Design Help): Need a tailored laser cutting 3D model or project guidance? I can design and prepare files for your exact requirements.
Explore my services
Creative Project Ideas: Looking for inspiration? Check out my curated ideas that you can adapt for your next CNC or laser cutting build.
See creative project ideas
Contact Me: Got a tricky fit issue or project question? Let’s connect and find the solution together.
Get in touch here
Some links in this article are affiliate links. I may earn a small commission if you purchase through them—thank you for supporting my work!
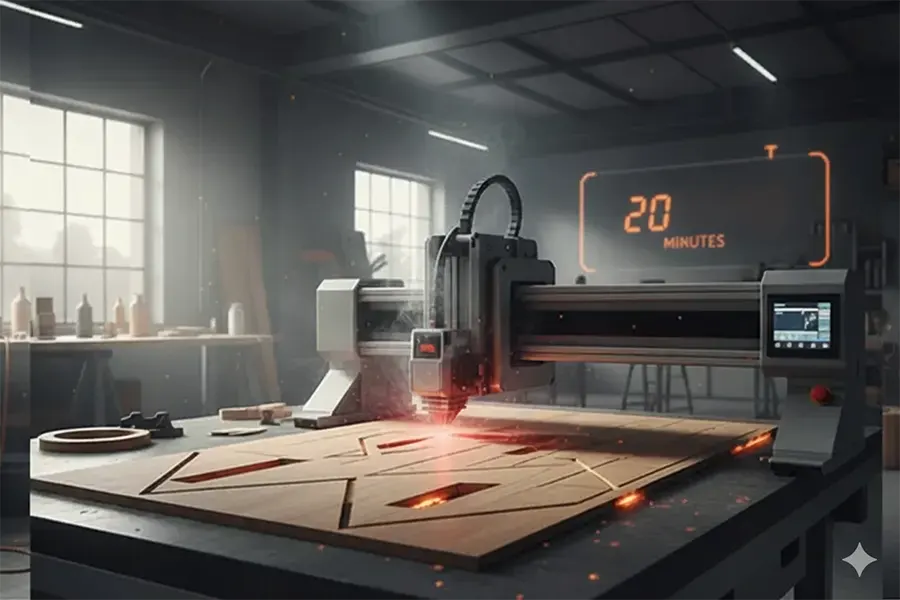
Measure your material thickness, cut a small test piece, adjust fit with ModMaker sliders, then export DXF/SVG and cut your parts. Try ModMaker
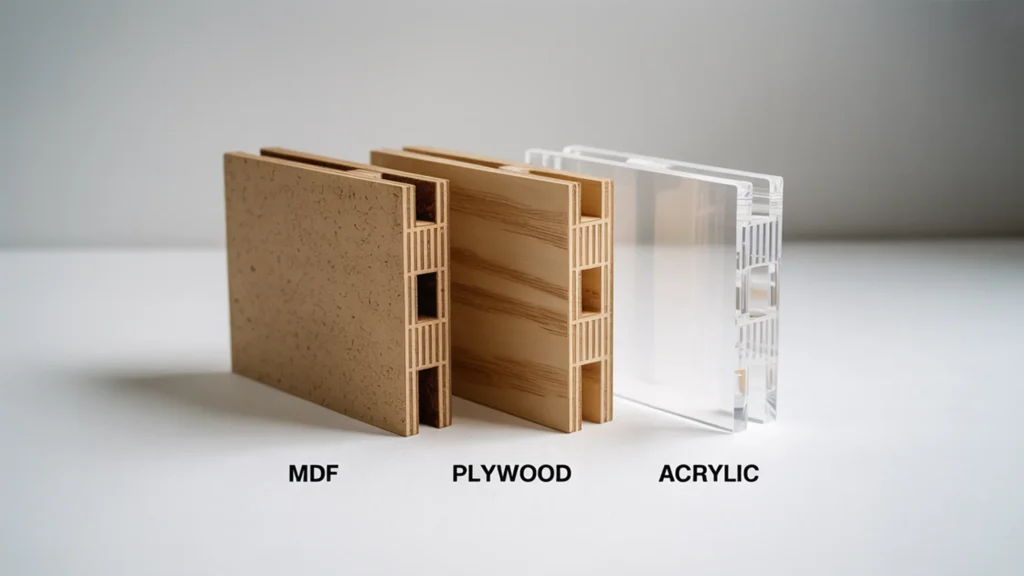
Yes, every laser cutting 3d model is parametric. You can change board thickness, dimensions, and fit settings before generating files.
Absolutely. The interface uses simple sliders, so even beginners can generate DXF/SVG without CAD skills.
You get both DXF and SVG files. Save them immediately after generation, as Turnifure does not store them.
Not always. Free test models are available, and you can unlock individual designs. PASS is best if you want unlimited models for a year. Explore Models
DXF/SVG files work with Vectric, AutoCAD, Fusion 360, SolidWorks, and most CNC programs.
Explore Our Free Digital Products!
Check out our free digital resources like stylish fonts (perfect for laser cutting), ready-to-use laser cut files (in SVG, DXF, PDF formats), and professional mockup bundles to showcase your products. Everything’s completely free—just explore, download, and elevate your creative projects! Click here to get started.
Want to Learn More?
If you want to master the complete process of laser cutting design & engraving, my detailed course covers everything step by step. You can buy my course to learn advanced techniques and tips that will help you create professional custom laser engraving designs with ease.
Check out My Custom Laser Engraving Design Blog Here
Check out My Custom Laser Cutting Design Blog Here
Check out My Custom Laser Cutting Neon Sign Design Blog Here
Get Expert Help & Services
Need professional help with custom laser engraving design? I offer expert services on Fiverr. If you need a custom engraving design tailored to your needs, check out my Fiverr profile.
Join My Newsletter
Want to receive the latest tips, tricks, and updates on laser engraving and cutting? Subscribe to my newsletter and stay ahead in your engraving journey!